Wednesday 19 November 2014

Mummy to be... Congratulation!

Hello there!

Half way through the week. Keep on going, weekend will soon be here!! ^_^

A good friend of mine, Monica, is going to have a caesarean tomorrow. She will become a mummy again for the third time and I can't wait to meet her little one. I made this card over the weekend for her, to celebrate and wish her good luck on the delivery of her baby boy.
Here is a closer look of the image.
This stamp image is an old one. It's from Elzybells which I believe is no longer available. It is the perfect 'mummy to be' image. I hand wrote the words and I hope it is not too ugly!! ^_^

As I recently heard another great news from my Japanese friend Kiko, I decided to make another card for her too. She is expecting a baby in January next year. Life is just wonderful when you are surrounded with all this great, surprising news!

So here are the cards. Same layout, same image but just slightly different colours.
I have created these two cards based on this week's sketch at Friday Sketch Challenge #82. It is an easy to follow sketch and I like it.  
That's it for now. Thanks for stopping by and I will see you soon. 
      

Sunday 16 November 2014

Bright Shiny Snowflake Card

Hello Peeps!

OMG! When was the last time I blogged? Life is getting a bit crazy but exciting at my little house. We had new house appliances fitted and new fences in the garden. (Finally, we have an oven = we will have Christmas dinner this year!! Hooray!) I am busy reading the manual so that I can operate them and my husband is busy painting all the fences to protect them.

Anyway, I am here today to share a Christmas card.
 
I love cards with movements! I used Spellbinders Shapeabilities Snowflake Pendants dies (S5-117) to die cut two of the snowflakes. I then used a metal brad to fix the two sized snowflakes on top of each other. To make the snowflake dangle, I attached it on a silver cord which is then fixed to the back of the backing paper.
 
I don't want to take the focus away from the Snowflake but still want to make it interesting so I chose a plain white card and embossed it with Cuttlebug Snowflakes embossing folder. I hand tore the embossing card at the bottom to reveal the pattern/words paper. I also inked the torn edges by using red ink just to emphasise the unique jagged line. I love the hand torn effect! Revealing of the paper fibre and the one and only squiggle tore line are just something that excite me!! ^_^
 
Here is the close up look of the snowflake. I used a red mirror card for the large snowflake to make it shine! 
 
I am entering this card to Virginia's View Challenge #9 - All Things Metallic. My red mirror card snowflake, metal brad and silver cord should count, right?
 
By using left over pattern paper and cards, I am also entering this card to Pixie's Snippets Playground - Week 151.
 
Thanks for stopping by. Have a nice weekend.


Saturday 11 October 2014

Clean and Simple Birthday Card

Hi Peeps!

These days I seem to be making more cards than I can blog and share!! I am in the card making mood these days. I love to show you all but I just need more time to post them on blog. You just can't win and can't get everything isn't it! ^_^

Here is a card which I made for my colleague and friend Jenny's birthday last Thursday.
I finally got the chance to play with my new Lawn Fawn Argyle Backdrops stamp set. As Autumn is here I thought of creating an Autumn theme (cute acorn) and colour (brown, green, yellow and orange) card.  The card layout is based on last week's sketch from CAS(E) this sketch! #95 which sadly I wasn't quick enough to post it online and miss the deadline! But hey~ making card is about fun and not just for entering on challenges right?! : P   
http://casethissketch.blogspot.co.uk/2014/10/case-this-sketch-95.html
The acorn, arrow and row of hearts stamp images are from Lawn Fawn's Into the Woods stamp set. The sentiment is from the Sentiment Sampler set by Paper Smooches.
The little smiley acorn has been stamped, coloured by Copic Ciao marker pens, fuzzy cut and then adhered by using foam pads. I love the simplicity of this card but it still has a lot of details such as the tiny gem for the dot on top of the "i", the peach colour heart embellishment and glitter glue added on those solid hearts. I believe these little details enhance the card design and made this CAS card interesting! Hence, I will be happily entering this card to Virginia's View Challenge #8 - Clean and Simple.
I hope your weekend continues to be wonderful and I hope I will be able to find some time to blog in the next day or two. See you soon~
      

Saturday 4 October 2014

Dangling Birthday Card

Hi Peeps!

First of all I would like to welcome my newest followers: Jacee, Kristie Goulet, Becky Seiler, and KT Fit Kitty. It is very encouraging to gain new followers so thank you!

I have been just so busy in the last few days. Trying to paint our bedroom and get my desk back! There is an alcove in our bedroom and for the last 10 years my desk was taken away and replaced by a baby cot/ toddler's bed for our two daughters. Now my girls are in their own room, I can finally have my desk back! Hooray! A place that I can craft and a place where the girls can do their homework. Hmmm... not quite sure about the sharing bit. That will mean I have to keep the desk tidy so that sometimes they can use it to do their homework. Well, wish me luck for keeping the crafting desk mess free!! Ha ha! ^_^

Anyway, I made this card last weekend and I just couldn't find the time to share and blog it. I think I still have time to join in the Paper Smooches Designer Drafts challenge.  This week we have a sketch.
So here is my card:
This is one of those cards which I didn't know how it would turn out or thought it might go horribly wrong. In the end it "accidentally" turned out to be rather good! I love it! I pretty much followed the sketch.
I stamped this cute cat, coloured with Copic Ciao marker pens and then fuzzy cut around it. Originally, I was going to use foam pads and just attach it on the card base but for some reason it just looks boring.  Then, a light blub moment above my head went "Ding!". I decided to adhere it on a circular acetate, layer with another small light green circle on top so that it made the image stand out. In order to make the acetate more visible, I also dotted white Liquid Pearls around it. I love moving cards, so instead of sticking the acetate image onto the base card itself, I hung it with a piece of string and let it dangle! Of course, with my love of beads I had to add some on the string. Here are a couple of close up photos of the acetate tag.  
I just love the fact that there is movement. Makes the card come alive! I think I will use this sketch again, change different images and make a few more cards like this. I hope you like this card too!
 
Paper Smooches are looking for a guest designer for November so I will be entering this card over there too. You never know if you don't try! Wish me luck!  ^_^
http://www.papersmoochesstamps.com/
 Enjoy your weekend and as always thank you for visiting!
      

Tuesday 23 September 2014

Cute Foxy Card

Hello Peeps~

Hope you had a good start to the week! ^_^

I made this birthday card for a good friend of mine at work. It's her birthday today and the card has already been dropped off at her house yesterday! Hooray!
I really enjoy making clean and simple style cards these days and trying to learn to like the white space. But Gosh! It is not that easy. It is a torture not to add anything at the top of the card. It looks bare and I really wanted to wrap a twine around it!! I forced myself to stop right there and try to  enjoy the white area of the card. I guess it wasn't that bad after all. After staring at it for a short while, I really like how it leads your eyes to focus on the main image rather than having too many other elements to distract you.
I wanted to highlight the little fox image, which is from Lawn Fawn's Into the Woods stamp set, so I cut a circular window in my card. I also used the Grassy Border Die from Lawn Fawn to cut two different tones of green grass. One I adhered to the card base itself, the other I raised up with foam pads to give dimension.  
I used Copic Ciao marker pens to colour the image and highlighted the stamp images with Stickles glitter glue and Glossy Accents.
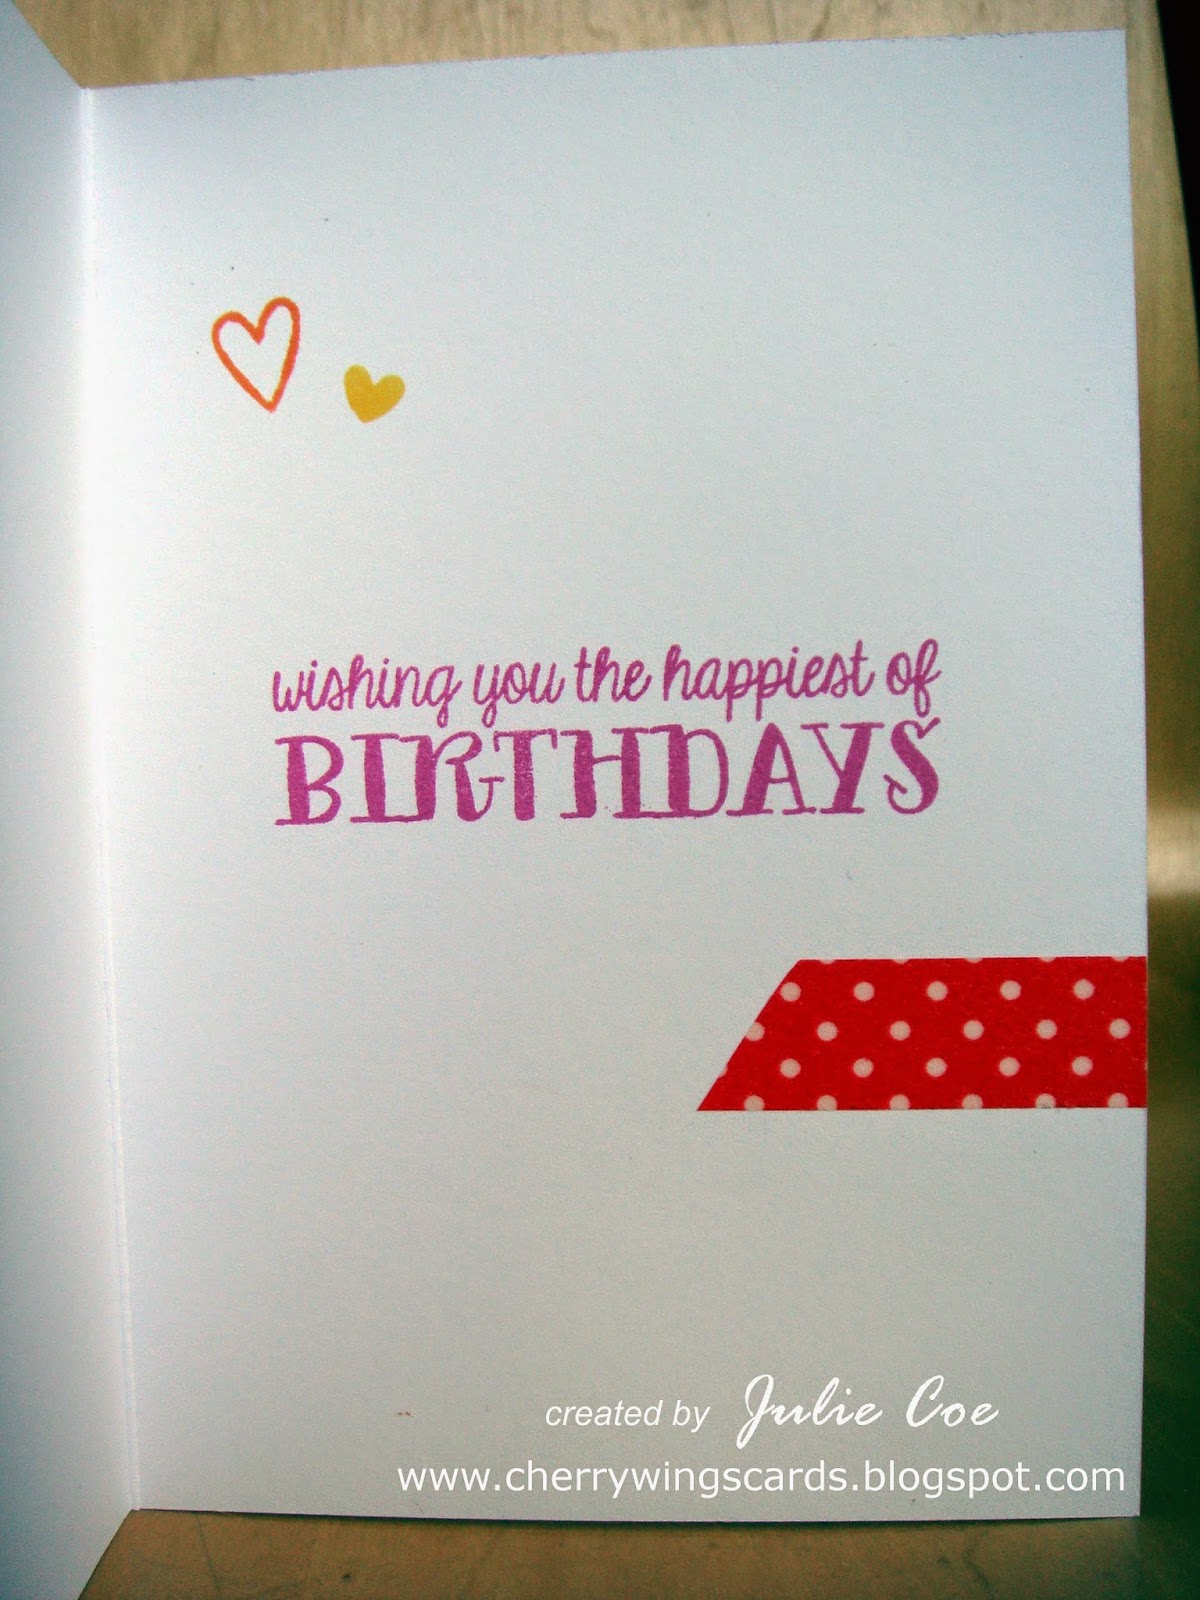
Inside of the card simply echoes the look and the colours from the outside. The red dotted washi tape is adhered at the same height as it  is on the outside of the card. This creates a continuous look. The sentiment is from Avery Elle:Cake & Candles set. To continue the look inside, I stamped the two little hearts in the same orange and yellow colours from the outside. I hope you like the card!
 
The following challenges inspired me to make this card:
Love to see you here. Thanks for popping by! ^_^ 
 
Edited: I am one of the Critters Galore Honorable Gnomes at Lawnscaping Challenges.
http://lawnscaping.blogspot.co.uk/2014/09/winners-one-layer-and-critters-galore.html
      

Friday 19 September 2014

Enjoy the happy times in life!

Hello there!

YEAH~ It's Friday!! ^_^ The best day of the week! (Of course, Saturdays and Sundays are even better!! Hee hee!!) Nothing special is planned here for the weekend but a few birthday cards are needed soon so I will be happily crafting away during this weekend.

I made a card the other day based on the current sketch challenge at Make The Day Special. The sketch is simple and easy to follow.
I made this card for a work colleague's birthday. Here is my card for this challenge.
Instead of a straight line, I used the largest scalloped border die from the Stitched Scalloped Borders Die set from Lawn Fawn to create a more interesting look. You will be able to see the scalloped edge and the partial cut circle more clearly in the photo below. To depict the colours on the blue and pale yellow-green striped ribbon, I layered an extra scalloped border in apple green to the blue scalloped edge.
For the main image, I used the Honey Bunny stamp set from Mama Elephant. I had fun dressing up this bunny by adding the top hat, bow tie and the monocle. I also added Glossy Accents on the monocle to make it look more like there was a piece of glass inside it.
The circle sentiment is from my own stash. I bought it a while ago when I was at the NEC Hobby Crafts show. I really don't know which company product this is from as it was loose on its own when I bought it. I would love to know if any of you recognise this stamp.

Oh~ I also added the same washi tape and ribbon inside the card. I carefully lined up the pattern with the washi tape and ribbon just below the bunny so when the card is closed it runs as if it is a continuous strip.
Of course, for this card, I used some cards and papers from my box of scraps so I am also entering this card to Pixie's Snippets Playground - Week 142. Phew! I think I am just about to make it with 11 hours to spare. ^_^

I hope you like this card as much as I do. Thanks again for dropping by and enjoy your weekend!

Wednesday 17 September 2014

Let's Party - Happy 40th Wedding Anniversary

Hi Peeps!

Hope you all had a good week so far.

We were invited to my husband's eldest brother and his wife's 40th wedding anniversary party last Saturday. It was a great gathering at a small local pub and the Spanish tapas food was delicious! So, here I am to share the card that I made for them on this special occasion.
I used the sketch from CAS(E) this Sketch #92 for my layout.
I do like to personalise my cards. It just makes the card special for someone. So, here I used alphabet peel offs to spell out their names on the banner. Here is a photo from the side:
For the main image, I used "Ben & Nora - New Year couple" stamp from Whiff of Joy. My oh my~ God knows when I bought this stamp. It must have been at least two years or more ago. It was never the "right" image for the card that I was making and I guess, as time has gone by, it has been forgotten!! Oops!! Well, at least this time I remembered. I inked it up for the first time and it is just the "right" image for this celebration card! Don't you think?! Ha ha!  For this reason I am entering this card to the NBUS Challenge #2. I've only recently discovered this NBUS (never-before-used-schtuff) challenge. I am sure we crafters often 'buy' faster than we 'use'! There is no doubt that I will be entering more new creations into this challenge.
I think this stamp image deserves a closer look. Since it is to celebrate a 40th Ruby wedding anniversary, I decided to use one of my favourite colour combinations- red and black. I think this colour combination is elegant and striking at the same time. Thus, I am also entering this card to crafts 4 eternity: R#193- Favourite Colour Combo.

I used Copic Ciao marker pens to colour the image and then added Crystal Stickles glitter glue on the scarf, necklace, gloves, bow and shoes. I am not sure if you can see it from the picture or not but I also added Glossy Accents on Nora's eye to make it pop and shine.
Thanks for stopping by and I hope you like the card. Have a nice evening!


Saturday 6 September 2014

First Christmas Card of 2014 - Happy Holidays

Hello everyone,

Today I am sharing an one layer card for the Lawnscaping Challenge: One Layer and the Simon Says STAMPtember® "Stamp-It" Challenge.

This is the first Christmas card I made for this year. Am I trying to be organised? Nah~ I simply just want to play with my new Lawn Fawn stamp set: Winter Penguin.
One layer card is always challenging. No additional layers of paper or card can be used apart from the base card. You will also need to keep the embellishments to a minimal. I stamped the images directly on to the base card and coloured them by Copic Ciao marker pens. (The little bird at the left is from Making Frosty Friends set, also from Lawn Fawn.) Next, I cut a hill shape and created a mask for the penguin out of post-it note. After covering up the penguin and the bottom half of the card, I used Tim Holtz mini blending tool to create the blue sky. Then I stamped these little snow flakes randomly in the sky by using silver ink. Here is a closer look of the image:
One layer card is daunting. However, with this cute stamp set, building a one layer scene seems to be easy and it is quick to make too. So quick and easy that I made 4 of the same cards in the end!! That is 4 cards added to this year's Christmas card stock. Well, everyone has to start somewhere and that's a start!! ^_^

Hope you like the card and thanks for stopping by.


Thursday 4 September 2014

Let's Shell-Ebrate!

Hi Peeps!

I played with my newish Paper Smooches- Party Posse stamp set yesterday. Paper Smooches is a new company to me and I just love their quirky, cute images. So here is the card:
Water colouring effect is a hit at the moment so I thought I would give that a try too. I used Memento inks in Dandelion and Bamboo Leaves, Brilliance ink in Pearlescent Sky Blue, with a little water to create the watercolour look background. The pearlescent ink is brilliant. It gives a subtle shine to the background which my photos here just do not do justice. Trust me, it does look pretty in real life!
I also love this sentiment- "Let's Shell-Ebrate" which comes with the stamp set. It's a fun saying! ^_^ I coloured the little turtle with Copic Ciao marker pens, fussy cut and adhered it on card with foam pads.
Green coloured cotton thread, white sequins and crystal Stickles glitter glue were added to embellish the card. At the last minute I decided to add some Glossy Accents on the turtle's toes. This makes it look like the turtle is wearing nail varnish! Ha ha! ^_^

I am entering this card in this week's Paper Smooches Sparks Challenge Blog: Anything Goes.
Also, I am taking this card over to the Sketch Saturday Challenge Week #325 where there is a choice of sketches to play with. I chose sketch #283 below for my layout.
I love this card. Or maybe I should say I started to love the "white spaces" on the card. Maybe I can do CAS (clean and simple) cards too?! Hooray!!  Thanks for stopping by and I hope you like the card too!